When you add a system to RocketLauncher you have to choose the default emulator – but what if RocketLauncher doesn’t list the emulator you want to use? Note: this is not how to add a new emulator/system if the emulator was not previously added. That has been covered on the RocketLauncher page here.
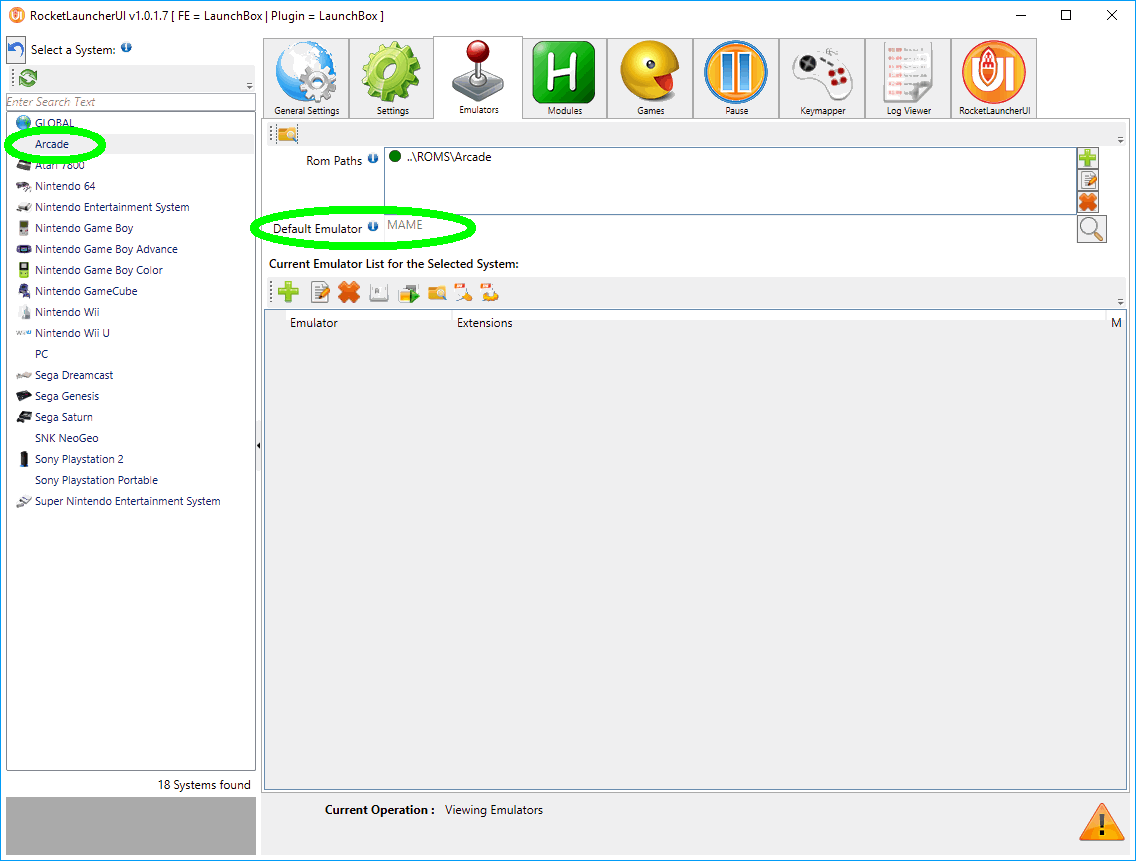
As you can see above, my System names (left column) don’t all correspond with “traditional” RocketLauncher names. In this case it’s because they were imported from LaunchBox. You can see that rather than being called “MAME”, the name (circled in green in the left side of the screenshot) is “Arcade”. While that is because it was imported from LaunchBox, it’s a more descriptive name for the non-initiated. Not that someone would be messing with RocketLauncher if they didn’t know what MAME was, but anyway.
The middle green circled area shows that I’ve chosen MAME as the default emulator. Initially, however, when pressed the magnifying glass icon on the right of the Default Emulator box, the choices that I was presented for Arcade’s default emulator were…nothing. That’s because the program file (.ahk file) that RocketLauncher uses to choose which systems MAME can run did not include “Arcade” in the list.
So how to fix? Relatively easy, actually, although you’ll have to accept that RL* will inform you that you’e changed their precious file. Normally that’s a good thing, because it keeps the terrorists from hacking into your computer and editing your RL’s ahk files to have MESS run your NES files instead of RetroArch. The horror.
Starts with latest game; can choose which game below in the video carousel. Or…
I'm biased because part of my family emigrated to the US (Buffalo, NY) from Ukraine,…
1. How to tell if you have Windows Subsystem for Linux (WSL) version 1 or…
This finally works. No more Virtual machines just to run PiShrink. That said - there…
There are a number of reasons online that are given for Win32 Disk Imager failing…